A while back I created a provider hosted app using CSOM in C# for creating project sites but this required the users to have sufficient permissions to create a site. Using Microsoft Flow, Azure Function, Azure Storage Queue, PowerShell and SharePoint Online I created a proof of concept with the latest techniques and using the AppId/AppSecret so the user doesn’t need additional permissions. This solution isn’t free as it needs an Azure Subscription but the costs are minimal. Please find references to Microsoft in the summary at the end.
This article describes the following scenario:
- The user creates an item in a SharePoint list.
- Microsoft Flow will be triggered on item creation.
- Microsoft Flow will add a message on the Azure Storage Queue.
- The Azure Function will monitor the Azure Storage Queue and create the subsite based on the values entered in the SharePoint list using PowerShell.
This article has the following chapters:
- Create SharePoint List
- Get and register AppId and AppSecret in SharePoint Online
- Create Azure Storage Queue
- Create Azure Function
- Create PowerShell Script
- Test Azure Storage Queue
- Create Microsoft Flow
Create SharePoint List
First we are going to create a list in SharePoint which we are going to use for our site metadata.
- SiteURL –> Single line of Text
- SiteTemplate –> Choice
- SiteLanguage –> Choice
The list has been created which we are going to use for our site provisioning.
Get AppId and AppSecret in SharePoint Online
It is possible to use a username and password for the Azure Function but it is also possible to use an AppId and AppSecret for impersonation.
In this scenario we are going to use an AppId and AppSecret.
Go to the site collection where you want to register the app by appending the url with “_layouts/15/appregnew.aspx”

Fill in the above information and click on create
Save the Client Id and Secret as we are going to need it for our Azure Function.
Next append /_layouts/appinv.aspx to the url

With the below Permission Request XML we allow the app access to the site collection. You can specify different levels which are explained at https://docs.microsoft.com/en-us/sharepoint/dev/sp-add-ins/add-in-permissions-in-sharepoint .
<AppPermissionRequests AllowAppOnlyPolicy=”true”>
<AppPermissionRequest Scope=”http://sharepoint/content/sitecollection” Right=”FullControl” />
</AppPermissionRequests>
and click on Create
Create Azure Storage Queue
We are going to setup the Azure Storage Queue which will handle all our messages which have been sent using Microsoft Flow.
Please note that this can also be achieved without the Azure Storage Queue as you can directly sent the message to the Azure Function using an Azure HttpTrigger function.
First go to your Azure Dashboard
![]()
Open the newly created storage account
The Azure Storage Queue has now been created which we use within our Microsoft Flow and Azure Function.
Create Azure Function
The next thing we will build is the Azure Function. The Azure Function will be created based on PowerShell and the SharePointPnPPowerShellOnline module.
We are going to start from the Azure Dashboard.

We are going to use the existing resource group and storage which we created during the Azure Storage Account. Click on Create
![]()
Open the newly created Azure Function
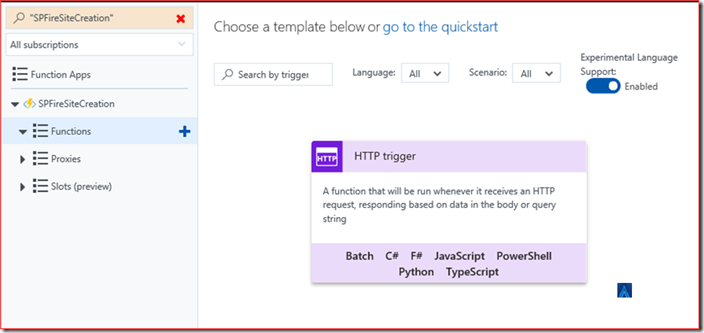
Enable Experimental Language Support and navigate to Queue trigger

Enter the queue name we created earlier. And click on New

Select the Azure Storage Account

Create and navigate back to the Platform features

Click on Debug Console and then on PowerShell

Navigate to Site –> wwwroot –> QueueTriggerPowerShell

Create a new folder called “modules”

We are going to upload the PowerShell DLL’s which we are going to use here as it is not possible to import-modules from within the Azure Function. You can drag and drop the files to this folder.
The files we need are by default installed in the following location: C:\Program Files\WindowsPowerShell\Modules\SharePointPnPPowerShellOnline

Copy the contents from this folder to the Azure Function.
If you are missing this folder; Install this using PowerShell on the workstation with the command: Install-Module SharePointPnPPowerShellOnline
Also copy the items from the following locations:
- C:\Windows\assembly\GAC_MSIL\Microsoft.IdentityModel
- C:\Windows\Microsoft.NET\assembly\GAC_MSIL\Microsoft.IdentityModel.Extensions
Go back to the function

Go to the application settings

Add the AppId and AppSecret with the key to the application settings as we can reference to these settings from the Azure Function.
Save the modification and in the next chapter we will create the PowerShell script.
Create PowerShell Script
Go to the QueueTriggerPowerShell in the Azure Function
$requestBody = Get-Content $triggerInput -Raw | ConvertFrom-Json

$ParentSiteUrl = "https://spfire.sharepoint.com/sites/projectsitecreation/"

$WebTemplate = $requestBody.WebTemplate

$SiteTitle = $requestBody.SiteTitle

$SiteDescription = "Site with PowerShell"

$SiteURL = $requestBody.SiteURL

$SiteLanguage = $requestBody.SiteLanguage

$AppId = $env:AppId

$AppSecret = $env:AppSecret

connect-PnPOnline -AppId $AppId -AppSecret $AppSecret -url $ParentSiteUrl

New-PnPWeb -Title $SiteTitle -url $SiteURL -Locale $SiteLanguage -Template $WebTemplate -Description $SiteDescription

Write-Output "PowerShell script processed queue message '$requestBody'"

Click on test in the right corner
{
“WebTemplate”: “STS#0”,
“SiteTitle”: “TestCreation1”,
“SiteURL”: “TestCreation1”,
“SiteLanguage”: 1033
}
and click on Save and run

You can verify the log for success and navigate to the created site
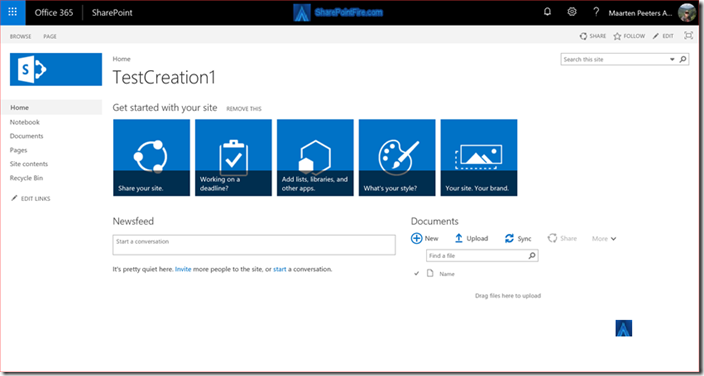
We now know that the PowerShell code is successful.
Test Azure Storage Queue
Go to the Azure Storage Queue to test if adding a message is being successfully processed by the Azure Function.

OK and you can verify if the Azure function picked up the message if you still have the log open

Or go to the newly created site
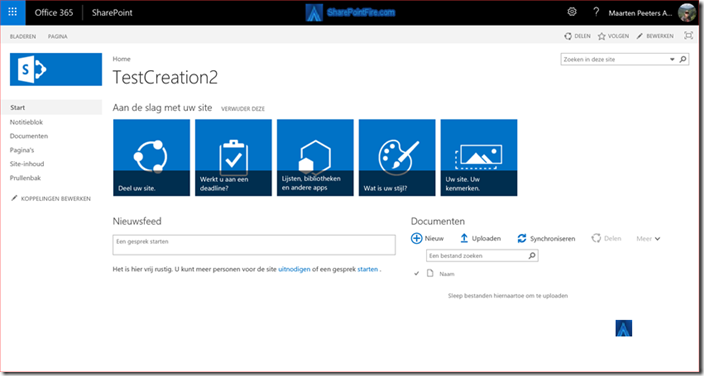
We confirmed the Azure Storage Queue with the Azure Function is working correctly.
Create Microsoft Flow
We can now create a Microsoft Flow that will add an message in the Azure Storage Queue which will be picked up by our Azure Function.
Go to https://flow.microsoft.com

Add a new connection if you already had one like me

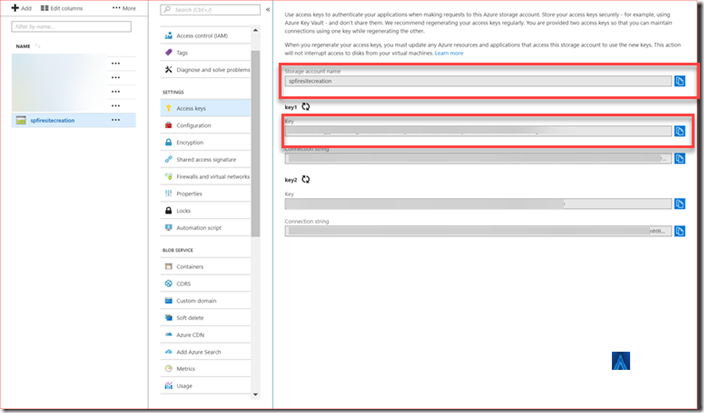
The Connection Name can be anything where the Storage Account Name and Shared Storage Key can be found in Azure
Save the flow and create a new item in the previous created SharePoint List
Save and first verify the Microsoft Flow

Next verify the Azure Function Log if still open

And last verify if the site has been created
The site has been created successfully.
Summary
We have now created a working site provisioning solution based on a SharePoint list.
This solution uses multiple techniques such as Microsoft Flow, Azure Storage Queues, Azure Functions and SharePoint Online.
This is just an example of working with these techniques but you can for example do more after the site creation such as adding extra permissions and set default columns.
It is possible to do more with Microsoft Flow as for example send an email after creation or update the status during the creation
You can find more information at https://docs.microsoft.com/en-us/sharepoint/dev/declarative-customization/site-design-pnp-provisioning regarding for example an app ID and app secret with administrative rights on your tenant, Microsoft Flow and an Azure function. Costs for an Azure Function are mentioned in https://azure.microsoft.com/en-us/pricing/details/functions and queue costs at https://azure.microsoft.com/en-us/pricing/details/storage/queues/
Information about the SharePoint PnP PowerShell CmdLets can be found at https://github.com/SharePoint/PnP-PowerShell and https://docs.microsoft.com/en-us/powershell/sharepoint/sharepoint-pnp/sharepoint-pnp-cmdlets?view=sharepoint-ps
Please let me know your use case for Azure Functions and if there are any questions.
